Baking soda clay handprints
|
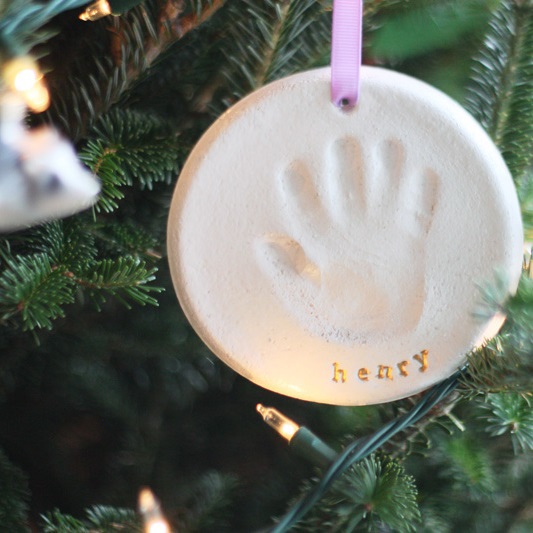
Baking soda clay handprints are a great way to capture the size of your kids hands whilst their still young, and make Christmas decorations too. Made with ingredients you’ll have in your pantry, these handprint keepsakes are fun and easy to make.
|


You might also be interested in ...
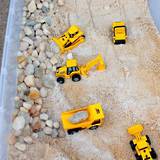
Make your own sand & rocks box
Don’t have enough room for a full-sized sandpit? Why not make your own sand and rocks box instead! It’s a great way for young kids to explore their senses of touch, sight and sound and it will help to develop their imagination through free-play too. Set the sand and rocks box up with a construction theme for hours of fun.


Kids indoor & outdoor party games
All kids love playing party games! So here are some tips and suggestions on fun-packed indoor and outdoor games which are sure to be a big hit.
join usJoin us on social media for all our latest news. |
sign upSign up and receive our latest newsletters. |
|
Made with ingredients you’ll have in your pantry, these handprint keepsakes are fun and easy to make.
Make your own baking soda clay handprints
What you'll need for your soda clay handprints
· 1 1/4 cups of baking soda
· 3/4 cup of cornflour
· 3/4 cup of water
· Saucepan
· Wooden spoon or spatula
· Bowl
· Damp cloth or teatowel
· Greaseproof paper or wax paper
· Rolling pin
· Cookie cutter (optional)
· Paint (optional)
· Glitter (optional)
· Pencil (optional)
· Ribbon (optional)
How to make the baking soda clay
1. To make the clay, put all the ingredients into a saucepan and heat on medium, stirring constantly with the wooden spoon or spatula.
2. The mixture will begin to thicken and come together in a ball. You'll know it's done when it resembles whipped mashed potatoes.
3. The clay will start to become dry very quickly, so take it off of the heat as soon as you see that mashed potato texture.
4. Remove the clay from the saucepan and place it in a bowl and cover it with a damp cloth or tea towel to cool down (approx 10-15 mins).
How to make the handprints
1. Once the clay has cooled down, place it on a piece of greaseproof paper or wax paper to prevent it from sticking onto the kitchen bench.
2. Then mould the clay into a round about 1cm thick (any thicker and it will start to crack) and large enough to fit around your child's hand.
You can flatten the clay using a rolling pin and a circular cookie cutter for neat edges, or flatten the clay with your hand or a plate for more natural edges.
3. Help your child centre their hand on the clay circle and press it down firmly. Their handprint should be easy to see. However if it’s not quite right, you can always try again.
If the clay is becoming a little dry, wet your hand a little bit before rolling it out again to give the clay some extra moisture.
4. Now it’s time to decorate the hand print using paint or glitter.
If you’re using glitter, just brush some glue onto the handprint first and then sprinkle on the glitter and shake off any excess.
5. If you are making a Christmas decoration, use the end of a pencil to make a hole in the clay at the top of your decoration and leave the clay to dry.
6. Once the clay has dried you can thread through some ribbon and hang your decoration on the Christmas tree.
More kids activity articles to enjoy:
- Kids handprint Christmas wreath
- 5 Ways to keep your kids hand and foot prints forever
- Painted feet art
Image source: yoursomartha.com